The post Loaded Potato Soup Recipe appeared first on The Mabelhood.
]]>In our house, 3 out of 4 of us are soup lovers. My youngest isn’t a soup fan, but I’ve mentioned before that he’d survive off buns, burgers, and mac & cheese if we let him, so his opinion doesn’t really count here. I think the only soup he’s ever really ‘approved’ of is this creamy dill pickle soup a local restaurant used to make before new owners took over. It was AMAZING! If I manage to find a recipe for something close to it and he gives it two thumbs up, I’ll definitely share it here.
Now, our oldest is a huge soup fan. He always has been. When he was little, he was all about chicken soups. He loved chicken noodle, chicken and rice, chicken vegetable, he loved them all. As he’s gotten older, he’s started to like cream soups as well. I’ve always been a fan of thicker soups and hearty stews, so I was pretty happy he came around to my kinda soups!
The recipe below for Loaded Potato Soup is a favorite in our home and in our regular meal rotation year-round. More so in these winter months of course. When you make something that one of your kids keeps asking you to make over & over again – you’ve found a winner! Kids are the best taste testers, aren’t they? They’re always brutally honest, so I know this soup must be good! Not only that, but it’s super quick and easy to throw in the crock pot in the morning and it just cooks all day. Your home will smell delicious!
If your family loves soup, I hope you all love this one as much as we do!
Loaded Potato Soup Recipe
Ingredients:
- 10-12 medium/large white (or yellow) potatoes
- 8 cups of chicken broth
- 2 tablespoons of Montreal Chicken Spice
- 1 whole onion
- 1 package of cream cheese
- 1 package of bacon
- Shredded marble cheese (or any cheese of your choice)
Directions:
- Peel potatoes and cut into cubes. Dice up the onion.
- Place potatoes and onions in the crock pot.
- Pour the chicken broth over top.
- Add the Montreal Chicken Spice and stir everything well.
- Cook on low for 6-8 hours.
- Once cooked, remove half of the potatoes and broth into a bowl and using a mixer, blend well with cubed cream cheese until smooth.
- Add mixture back into crock pot and mix well.
- Cook the bacon and cut it up into pieces.
- Pour soup into bowls and add desired amount of shredded cheese and bacon on top.
- Enjoy!
Notes:
- If you don’t like chunks in your soup, you can remove more (or all) potatoes to blend.
- We usually serve this soup with some garlic bread. (at my youngest’s request, of course!)
What’s your favorite soup? Italian Wedding? French Onion? Classic Tomato?
The post Loaded Potato Soup Recipe appeared first on The Mabelhood.
]]>The post Homemade Sandwich Bread Recipe appeared first on The Mabelhood.
]]>I’ve always insisted on eating mostly organic and once I had kids, my obsession with wholesome food got even worse. For the most part, you can find really good organic food at your local grocery store. You may pay a pretty penny for it, but it’s there. The one thing I was not finding at my local stores, however, was organic bread. I can see why: it spoils easily if not kept in perfect conditions and eaten fairly quickly. I knew that if I wanted my family to eat really-good-for-you bread, I would have to find my own homemade sandwich bread recipe.
Here’s the thing: I hate cooking. I hate baking. I pretty much hate being in the kitchen. I’m the type of wife/mom who does what’s necessary to put a nutritious meal on the table but don’t expect anything fancy (my husband, on the other hand, missed his calling as a chef, so I lucked out there!).
I knew that if I was going to start making my family bread, it would have to be the simplest recipe possible. So, with some trial and error, I figured something out! I created a simple yet delicious bread recipe that I make for my family all the time!
I use my bread machine for the mixing and kneading part of it so I hardly have to do any work!
Homemade Sandwich Bread
3 cups organic all-purpose flour (you can use white whole wheat if you prefer)
1/4 cup organic vital wheat gluten flour
1 tsp salt (I use Real Salt)
9 ounces warm water
1 tbsp milk (I’ve used almond milk too)
2 tbsp organic butter, chopped into pieces
2 tbsp honey
2 1/4 tsp fast rise yeast
Instructions:
Put all the ingredients into the bread machine (use your specific machine’s instructions, but mine calls for me to put in all wet ingredients first and then the dry).
Set your machine to it’s required settings and let the machine do all the work for you (i.e., if you’re making a honey-white loaf, set it to white, if you’re making a honey-wheat, set it to wheat). If you are making by hand or with a mixer, mix ingredients and then knead the bread until it forms a firm ball.
Once the machine is done kneading the bread, take the dough ball out of the machine (I always cover my hands with olive oil so it doesn’t stick to me) and press into a greased loaf pan, cover with a clean towel and let rise for an hour. (Personal note: I don’t let the bread machine bake my bread because I’ve never liked how it’s turned out. If you don’t mind it, let the machine do all the work for you! But I personally like to bake my loaf in a normal pan in the oven because I find it bakes much better and the loaf comes out a normal size.)
Preheat the oven to 350F.
Bake in the oven for about 24 minutes.
When the bread is lightly golden on top, remove from the oven and take the loaf out of the pan, setting it to cool on a rack (I usually slide a butter knife around the edges to loosen it a bit before popping it out of the loaf pan).
Let it cool. Enjoy!
So, so easy to make and AMAZING to eat! The trick to keeping the loaf fresh for about a week, I have found, is to keep the loaf in a bread keeper like this one. I also bought this awesome contraption to make slicing the bread easy and uniform (because I’m OCD about the thickness of my bread slices).
We gobble this bread up! Not to mention that it makes your house smell like heaven while it’s baking. Yum!
Another one of our most loved recipes is this one, Crispy Lentil and Spinach Fritters
The post Homemade Sandwich Bread Recipe appeared first on The Mabelhood.
]]>The post Crispy Lentil, Spinach and Feta Fritters appeared first on The Mabelhood.
]]>
(Updated Feb 2023, back by popular demand!)
Last year, my family and I made an effort to eat less meat. We started with “Meatless Mondays” and now we are aiming for “Meat-free Fridays” too. I wanted to come up with something that was still tasty and fun, yet packed with goodness. So after some brainstorming, I concocted my Greek-inspired Crispy Lentil, Spinach and Feta Fritters.
Always trying to incorporate more veggies into our meals, these protein-packed lentil patties have just the right combination of tangy, low fat feta cheese, black olives, spinach and a good hit of lemon. We even use them as a hamburger substitute and throw a fritter on a bun with cucumbers, tomatoes and a dollop of tzatziki.

My kids love them! Add a squeeze of extra lemon and serve warm or cold. They also freeze great and are a regular addition to my daughter’s school lunch.
According to Lentils.org, my go-to resource and inspiration for lentil-based recipes, lentils are a powerhouse of nutrition. They are a low-fat source of potassium, calcium, zinc, niacin and vitamin K, but are particularly rich in dietary fibre, protein, folate and iron. These are a really fabulous meat-free alternative if that’s something you’re looking for!
Crispy Lentil, Spinach and Feta Fritters (makes about 12 fritters)
Ingredients:
- 1 can cooked lentils (540 mL) or about 2 and a ¼ cups, washed and drained
- 3 tablespoons freshly squeezed lemon juice
- 1/2 cup reduced fat feta cheese, crumbled
- 1/2 cup of pitted black olives, chopped
- 1 tablespoon fresh or dry dill, finely chopped
- A few pinches of sea salt and freshly ground pepper
- 1 cup of frozen chopped spinach, slightly defrosted and separated or 1 cup sautéed fresh spinach, chopped
- 1 large garlic clove, finely chopped or put through a press
- 2 large eggs
- 1/3 cup whole wheat bread crumbs

Directions:
- I pulsed half of the lentils in a food processor and left the remaining half whole.
- In a large bowl, add the lentils, eggs, garlic, dill, lemon juice, salt/pepper, feta cheese, bread crumbs, chopped black olives and mix well with the chopped spinach.
- Allow the mixture to stand for a few minutes, enabling the bread crumbs to absorb the lemon and eggs.
- Heat some olive oil in a large skillet or frying pan and set to medium.
- Form lentil cakes or patties about 2 1/2 inches in diameter and 1/2 inch thick. Place the patties in skillet, in batches if necessary.
- Cook the patties until they’re browned on the outside, 3 to 4 minutes per side and then flip.
- Serve warm with a squeeze of lemon and dip in tzatziki, a flavoured mayo or plain Greek yogurt. ENJOY!
 Another fan favorite recipe is this organic homemade sandwich bread
The post Crispy Lentil, Spinach and Feta Fritters appeared first on The Mabelhood.
]]>The post How to Host Superbowl Sunday Like a Champ appeared first on The Mabelhood.
]]>FOOD:
Make a list
This year with the price of groceries so high, I did some calculations and the amount of ingredients needed will cost far more than the cost of buying pre-made trays and platters.
If you are planning on making the food, here are a few easy and delicious recipes to try!
Order in Advance
Don’t leave this to the last minute or your order may not happen on such a busy day. Some good Superbowl options are Pizza, wings, subs
Ask for help!
Ask each guest to bring a specific appetizer/dish to share with the party.
For your sanity at the end of the night, request that their dishes are property labeled with their name
Set up a buffet table in advance with napkins, plates, silverware, condiments, etc.
HOUSE LOGISTICS:
Make Space
Clean out the refrigerator ahead of the time to make room for what guests may bring. And because cheese trays, meats, cut fruit etc. should not be left out for longer than 2 hours- so to keep your guests safe – make sure you’ve got space to refrigerate those items.
Ice, ice Baby
Keep a large tub of ice for available with a variety of drinks. Allow guests to grab what they want. Don’t play bar tender, or you won’t enjoy your day. If you live in a colder climate – place the bucket outside the door to save on fridge space. When guests arrive let them know where drinks are being chilled, so if they’ve BYOB’d they know where to put their stash.
Prepare for the dishes.
Empty your dishwasher so cutlery and dishes can go straight in. Admittedly, I usually use paper plates and have a garbage bag available for people to use. I understand this isn’t the most environmentally friendly, and yes, I have guilt about it. I’ll aim to do better next time.
KIDS PREP:
Keeping the kids happy, helps the parents enjoy the party. So, the effort you out in ahead of time for the kids will help on Sunday and you’ll thank yourself.
Make an activity table for kids
Set up coloring books, stickers, and crafts. The internet has loads of simple printable with a football themes. Parents will very much appreciate the effort to keep the kids busy!
Have separate Kid food:
I also like to set up separate snack table for kids, it sounds like more work, but it’s simple: Hotdogs or pizza for dinner. Then for snacks, a small bowl of candy, a bowl of chips, cut fruit and some water bottles or juice boxes. This allows the kids to be a little more independent and is more kid friendly and easier to navigate for kids than the adult table.
DÉCOR:
Full-disclosure, I don’t really bother. By the time the house is full of people decorations either get in the way or get lost in the crowd. Truly, your guests won’t mind (or even notice) they’re not there for the decorations.
What I do attempt, balloon in the team colors. Truthfully, I don’t do this totally for the element of décor but more so because the kids at the party LOVE a game of keepy-uppy and it occupies them for a long time. Two birds, one stone!
Let us know how your Superbowl Party went, and best of luck if your team is playing!
The post How to Host Superbowl Sunday Like a Champ appeared first on The Mabelhood.
]]>The post Best Sippy Cups for Transitioning your Breastfed Baby appeared first on The Mabelhood.
]]>A good rule of thumb is if they can sit up in a highchair, they’re probably ready to try a sippy cup. Of course, there may be babies where this rule may not apply, but as the parent, you’ll know (and don’t listen to other people’s noise or opinions, you know your baby best).
Here are three tips that help transition from breastfeeding to a sippy cup:
Start dropping one feed at a time:
Dropping breastfeeding altogether can be tough on both mom and baby. Gradually reducing the number of feeds seems to be a smoother transition from breast to sippy cup.
Let them play with the cup first:
Switching from breast to bottle is a big difference. Allow your little one time to adjust to the new cup. Provide them with the sippy cup before you intend to use it; they’ll get comfortable with it (holding, touching, and playing with it). This gives them a little time to feel comfortable with the bottle itself before you introduce liquid. You can assist and guide them through learning what it is.
If one cup doesn’t work, try again:
Multiple factors can lead to whether a sippy cup will work. And if one doesn’t work, try another. When first starting to shop for a sippy, a few things to consider are the age of your baby and their ability to hold the cup; some cups can be pretty heavy for low-tone babies. Or they can be too wide for small hands. So start with these considerations, and from there, consider flow speed, nipple softness etc.
If a sippy cup doesn’t work for you, consider passing it along to a friend to try with their little one. Although some sippy cups can be recycled, you’ll have to check the grade of plastic and your local recycling guidelines.
What features to look for before buying when you’re transitioning your breastfed baby :
1) Weight – breastfed babies aren’t used to holding a bottle, and some can find them heavy.
2) Width- if your little one has small hands, don’t purchase a wide bottle.
3) Handles- breastfed babies find gripping handles a little easier than holding the cup.
4) Dishwasher safe- because washing all the pieces can be annoying!
5) Spill-proof – Often, the reason parents transition with a sippy cup is that they want to avoid spills, so make sure your cup is spill-proof and leak-proof.
Best Sippy Cups for Transitioning your Breastfed Baby:
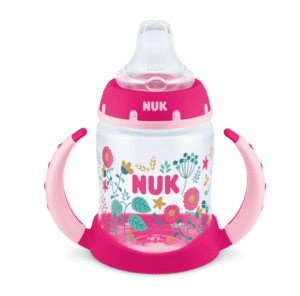
NUK® 5oz Learner Cup | NUK Canada (nuk-canada.ca)
This is our top pick for transitioning to a sippy cup. The two features we found most helpful were the air vent to reduce the air swallowed and slow down the flow. Plus, the handles make it easy for little hands to hold, yet are removable for when they’re more comfortable with it. It’s dishwasher safe.
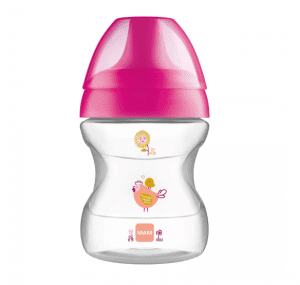
Learn To Drink Cup 6 oz – Drinking Cup (mambaby.com)
Another soft spout for an easy transition. The shape is designed for a better grip with small hands. Dishwasher safe. This has an internal valve to prevent leaks.
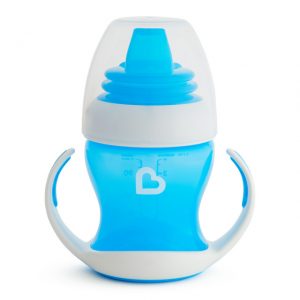
Gentle Transition Cup, 4oz | Munchkin
Another great option for transitioning Munchkin. The Munchkin products are often a little heavier, so for some babies and toddlers, it can be hard to hold, although this one isn’t too bad. The handles are not removable—dishwasher, safe- top rack.
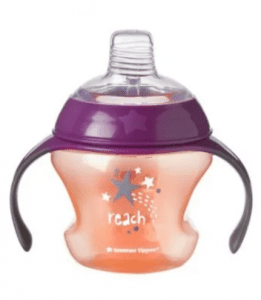
First Sips Soft Nipple Transition Cups (4 months+) (tommeetippee.com)
If your little one drank from a tommee tippee bottle, they’d likely adjust to this easily. The remove spout options are great. It’s not leak-proof so keep that in mind. The handles are removable, and all parts are dishwasher-safe.
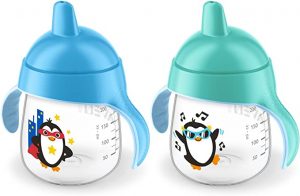
Philips Avent My Easy Sippy Cup 9oz, Blue/Teal, 2pk, SCF553/25 : Amazon.ca: Baby
This training cup is third in the list of stages for Phillips Avent, but in our experience, we could skip the first two stages, and this sippy still worked great for us after a bottle. But if that doesn’t work for you, check out the Penguin Sippy as a starter.
Another part of new sippy cups is, of course- labeling them! Here are the best labels for your sippy cups:
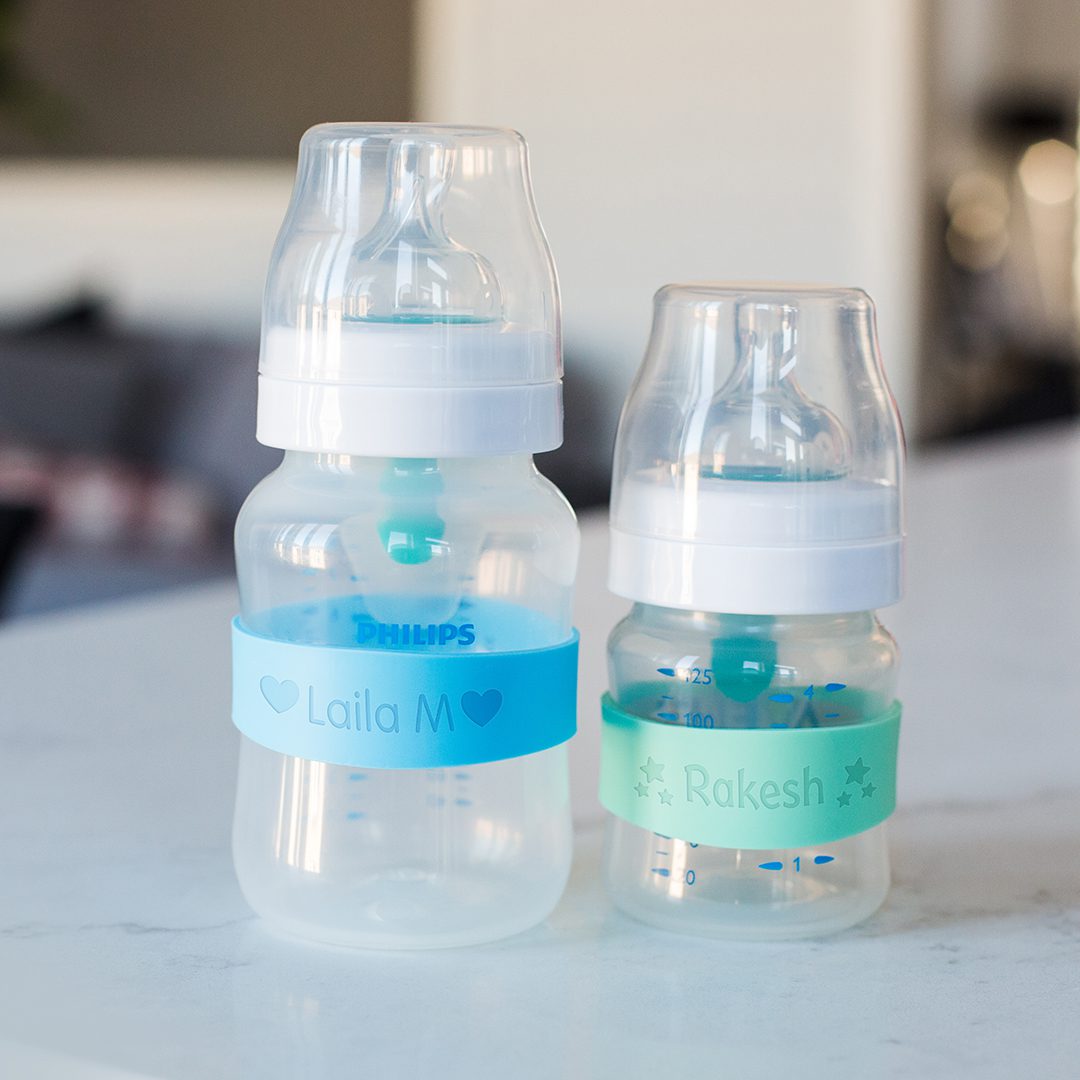
Baby Bottle Bands – Mabel’s Labels (mabelslabels.ca)
We love the bottle bands because they can squeeze themselves over bottles and provide an excellent grip for little hands, even when wet. Your little one’s name is custom engraved, and they can go in the dishwasher time and time again.
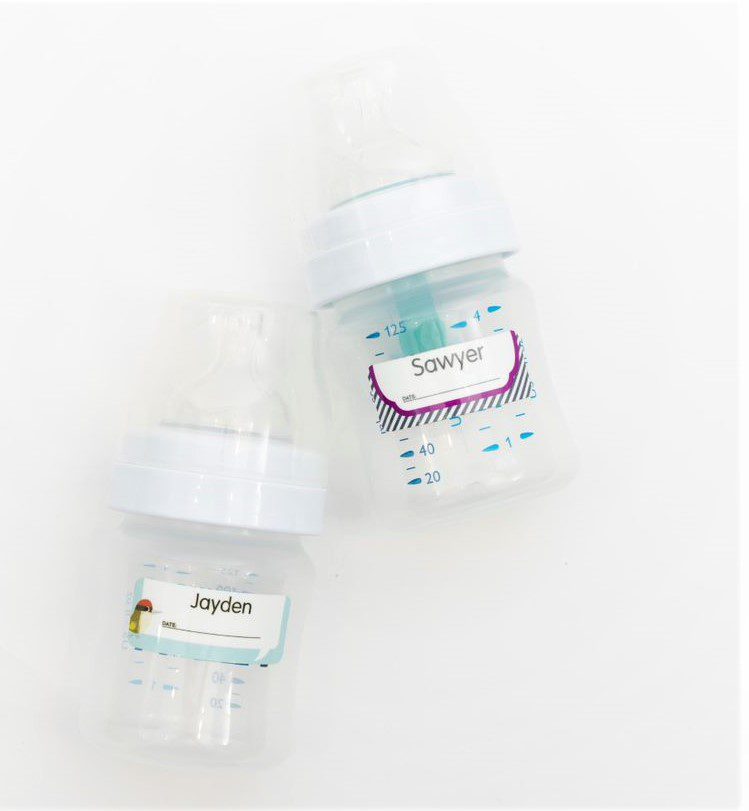
Baby Bottle Labels – Mabel’s Labels (mabelslabels.ca)
Depending on what’s in your sippy cup, you may need these labels if you want to have them labeled with a custom label and the ability to add a date and wipe on and off as needed.
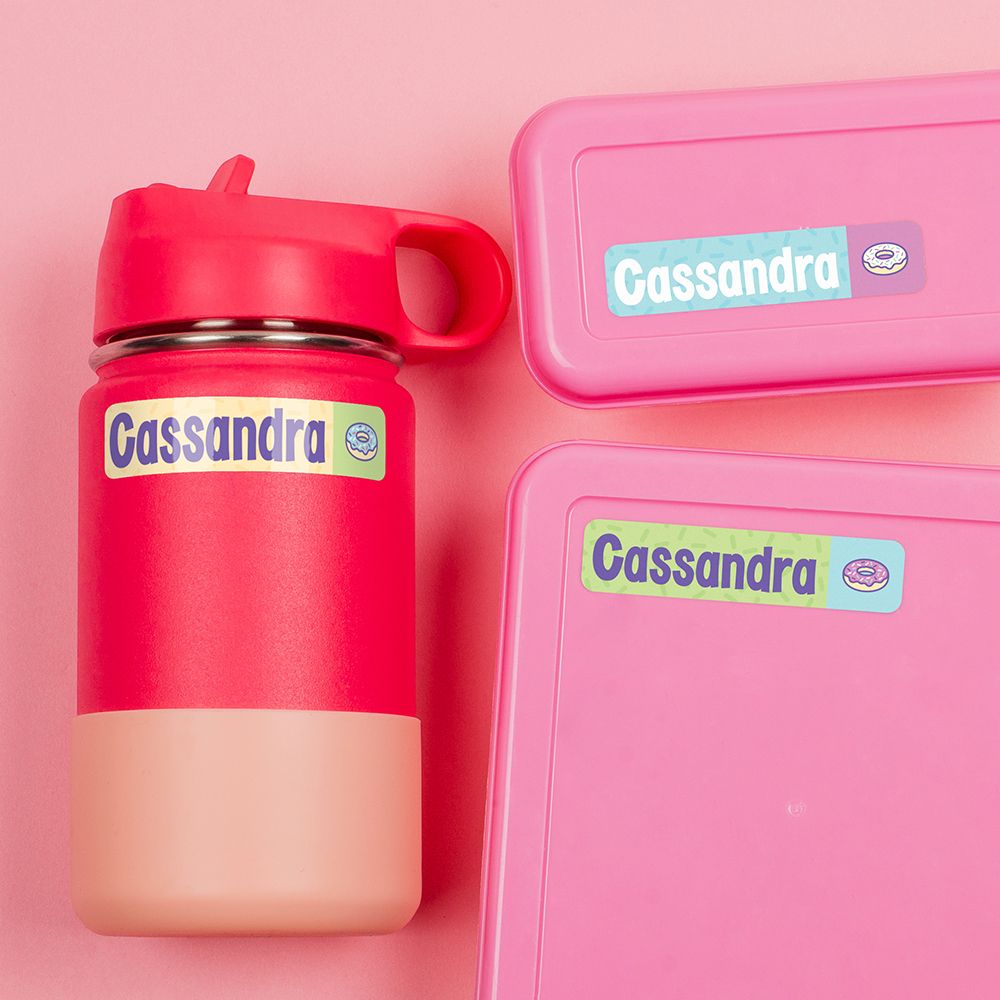
Large Rectangle Labels – Mabel’s Labels (mabelslabels.ca)
Perfect for labeling sippy cups, they’re easy to see, waterproof, dishwasher safe and come in many adorable designs.
Whichever cup works for you is obviously the best, so don’t stress over the details and just find what works for your little one. Here is a similar list of baby bottles. And if you’re looking for tips on transiting to daycare. Good luck, mama!

The post Best Sippy Cups for Transitioning your Breastfed Baby appeared first on The Mabelhood.
]]>The post 5 Easy & Delicious Superbowl Recipes appeared first on The Mabelhood.
]]>
So, in honour of this absolutely appetizing event, we decided to roundup 5 of our favourite game day recipes from around the web. They’re quick and easy to pull together and so yummy, you won’t have any leftovers (which, in this case, is definitely a good thing). Game on!!
Mozzarella Bites:
 Recipe here on PureWow.
Fully Loaded Black Bean Nachos with Red and Green Salsas:
 Recipe here on Bon Appetit.
Blue Cheese Guacamole Stuff Mushrooms with Buffalo Sauce:
 Recipe here on Half Baked Harvest.
Slow Cooker Buffalo Chicken Sliders:
 Recipe here on Real Housemoms.
Potato Skins:
 Recipe here on Simply Recipes.
The post 5 Easy & Delicious Superbowl Recipes appeared first on The Mabelhood.
]]>The post Pantry Labels: Five steps to a Pretty Pantry appeared first on The Mabelhood.
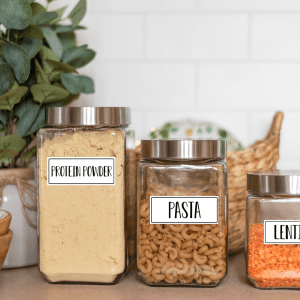
]]>We love the look of a neatly labeled pantry. And perfectly cute pantry canisters labels. Not only can you be a feel organized, but in doing so you your pantry into something Pinterest worthy, and that’s so satisfying. However, here in lies the problem – cannister commitment issues. It’s so hard to commit to a canister with a beautiful label if we’re worried it might change. We’re here to tell you show you 5 ways you can move beyond cannister commitment issues.
1) Take Counter Inventory.
Look at what sit our on your counter all the time. In my house, it was our favourite cereal, oats, the coffee pods and sugar. These items were always just in their boxes floating around the counter tops in and out of the cabinets, looking messy.
2) Take interior cabinet inventory.
Next, I noted what was most used inside the cabinet. In my home it was brown rice, walnuts, quinoa, and pasta. As well as protein powder, almonds, flour, and cookies. Everything else was in cans or fresh items not suitable for canisters. From this inventory I was able to create my list:
Cereal
Oats
Coffee
Sugar
Brown Rice
Quiona
Pasta – Spaghetti
Pasta- Rotini
Flour
Protein Powder
Almonds
Walnuts
Cookies
3) Note the sizes you need.
Most of them were self-explanatory (tall for pasta) tiny for sugar. Big for flour. I found a set that had what I needed. Although I purchased a cookie jar separately. And needed to purchase a separate canister for my flour, as the set I bought didn’t include that. So make sure your set has something for everything on your list.
4) Know what needs to be airtight.
I bought all my jars airtight just to be safe. But it’s important that you get a good seal on stuff like your flour/ protein powder/ and cookies (although, in our house they don’t last long enough to even go stale)
By the time I reached step 4, my commitment issues were getting better. I had everything in my canisters for a week. On my countertop I had coffee pods, sugar, cereal and oats. Everything else was in the pantry, cupboards or refrigerator (we refrigerate our almonds and walnuts). I have found that the kids seemed to reach for a handful of nuts more often than they did when the nuts were in a bag, so that’s a win I didn’t expect!
5) Time to Label!
I had not yet labeled- I planned on living with our unlabeled canisters for only a week or so. I wanted to know for sure that I’d made the right decision. However, after only a few days I decided to go for the pantry container labels, everything felt right, and I was so excited to get to the final step! I labeled – they look amazing, and I have no regrets!
So, follow these four steps and you too can overcome your canister commitment issues! You’ll thank yourself when your countertops look organized, your pantry looks Pinterest worthy, and your kids are actually eating almonds!
Now that you’ve mastered the kitchen, give the rest of the house a try!
Here are the pantry labels I chose:
The post Pantry Labels: Five steps to a Pretty Pantry appeared first on The Mabelhood.
]]>The post Tips for How to Pack a Hot Lunch appeared first on The Mabelhood.
]]>My youngest is picky on a good day. He doesn’t like sandwiches. He turns his nose up at wraps. He doesn’t like cold vegetables. He won’t eat cheese. He hates yogurt with the “chunks” in it. He’ll only eat plain vanilla. Watermelon is too squishy. Oranges are too juicy. He’s the kid that will tell me he likes something one week and then stop eating it the next. He’d live off buns, mac and cheese, muffins, and croutons if you let him. Yes, croutons.
When it comes to packing lunches, he’s a challenge to put it mildly. So, when he tells me he wants hot food in his lunch, I know this will probably only last a week before he tells me he doesn’t like hot food in his lunch anymore. I think a week might be generous.
If I’m going to give this hot lunch thing a whirl though, I’m going to do it right! So, I did a bit of research, talked to some Mom friends who have kids that actually like food, and I came up with a few tips to make sure packing hot lunches this winter goes smoothly.
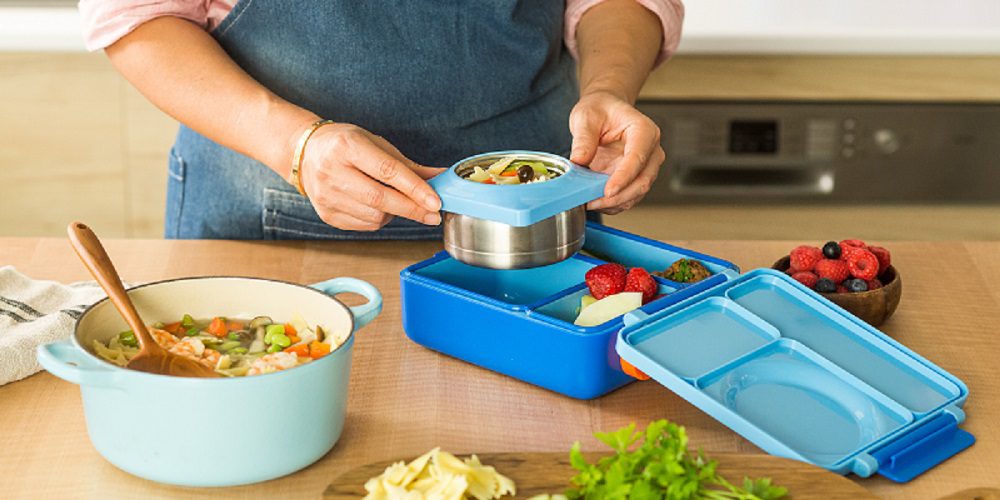
Tip #1 – Buy a Good Thermos
My biggest tip for packing hot lunches this winter is the thermos. You need a good thermos. We love Omie because you can have the thermos and lunchbox in one!
You know the saying “you get what you pay for”? Well, it’s probably true in this case. If your kids are anything like my youngest, they can be a little rough on things. So, you’ll want to invest in a thermos that will not only keep things hot but will also withstand being bumped all over the place! (We’re on water bottle #3 already this year!)
Tip #2 – Keep Food Hot
Okay, so most of us think if we put the food into the thermos steaming hot, it will still be steaming hot at lunch time, right? Well, not always. So, here’s what you do – boil a pot of water and pour it into the thermos while you’re preparing lunches. Then, drain the thermos right before you add in the food. The heat from the water will warm up the thermos to keep food hot until it’s ready to eat.
Tip #3 – Prevent Sogginess
Kids love chicken nuggets, right? But they don’t love soggy chicken nuggets. Trust me. So, stuff the bottom of the thermos with a paper towel to absorb all the liquid and prevent foods from getting soggy. Brilliant, isn’t it? I’d love to take the credit for this one, but I read it online somewhere and I just thought it was genius!
The best items to keep hot are always liquids like soups, stews and saucy pastas!
Tip #4 – Variety
That thermos isn’t just for soup and chicken nuggets! There are so many delicious items you can pack so the kids still have a hot lunch without getting bored. Think chili, pasta dishes, pizza rolls, even dinner leftovers like meatloaf or stir fry. I mean, my kid won’t eat half of those things, but I’m hoping yours will.
It also helps to engage them with their lunch, so keep things fun and kid-friendly by packing condiments/snacks on the side for dipping or sprinkling, like crackers or cheese to go with soup or pasta. When they can engage with their food it makes for an exciting lunchtime!
Packing lunches is not always easy, but I hope these tips help as we head into those winter months. Oh, and if you’re a hot lunch packing pro, we’d love to hear from you! Share any tips we may have missed in the comments below.
The post Tips for How to Pack a Hot Lunch appeared first on The Mabelhood.
]]>The post 8 Easy School Lunch Ideas for Your Picky Eating Kindergartener appeared first on The Mabelhood.
]]>-
Sweet Potato Fries
Kids love French fries, so I thought I would develop a healthier version. You can cut up the potatoes a night prior, and just air fry them with a drizzle of olive oil, and they are ready to go. Letting them completely cool off before packing them in their lunch box will prevent them from getting soggy.
-
Healthy Dips
Everything tastes good with a good dip. If there are certain veggies that you want your child to try, you can add a healthy dip along with it to make it more appetizing. Air-fried veggies are crunchy and go very well with hummus, guacamole, or any other dip your child enjoys.
-
Pita Pizza
This quick and easy snack takes only a few minutes to make, and the kids love it. All you need to do to make it is, spread some pizza sauce over pita bread, add chopped veggies of your choice, and sprinkle it with cheese. It can go in an oven-toaster, or you can pop it in the oven to bake until the cheese melts.
-
Pasta
This is my go-to hack when I don’t have time to think about what to make. Boil some pasta; it could be spaghetti, macaroni, or anything you know your child likes. Then, in a pan, add some leftover veggies or meat from dinner, add some pasta sauce, mix it up, and your kids will love it.
-
Wraps
Wraps are versatile, and you can adjust them according to your child’s preference. Grilled or baked chicken goes well with crunchy lettuce and a good sauce. They are filling and very delicious.
-
Tacos
If you have made minced meat for dinner, the leftover can make great lunch for the next day. Fill the shells with the meat and veggies of your choice, and they are good to go.
-
Egg/Veggie Fried Rice
This can be made a night before, and you can warm it up before packing it in the morning. Fry some carrots, green onions, lettuce, corn and an egg in very little oil. Add boiled rice and some soya sauce in it and mix it up. You can omit or add the vegetables according to your child’s taste.
-
Finger Fish
Kids love a snack that is easy to hold and eat, and finger fish is exactly that. You can add some tartar sauce to go along with it, if your child prefers.
While preparing a healthy lunch can be overwhelming for most of us, parents should know that they can send in anything that their child enjoys. There will be days when you will receive an uneaten lunch box and there will be days when you receive an empty one. What matters is that our children develop a healthy relationship with their food. You are doing a great job filling the little learners bellies! Also, don’t forget to order your lunchbox labels!
Here is a great recipe you can try that the kids might love.
The post 8 Easy School Lunch Ideas for Your Picky Eating Kindergartener appeared first on The Mabelhood.
]]>The post Non-candy Treats to Consider for an Allergy Aware Halloween appeared first on The Mabelhood.
]]>You may have heard of The Teal Pumpkin Project in recent years. It’s an initiative that raises awareness for food allergies and the goal is to make trick-or-treating safe and more inclusive for the many children who have food allergies, intolerances, and other conditions. It’s quite simple to participate too! Just place a teal pumpkin on your doorstep to let trick-or-treaters with food allergies know that you also have non-food treats to give out that are safe for everyone. Need some non-candy ideas? We’ve made a list of some great ideas that you can find at most dollar stores. Remember to keep them in a separate bowl from candy if you’re planning on giving out both.
- Glowsticks or glow necklaces.
- Pencils, pens, or markers
- Bookmarks
- Halloween erasers
- Bouncy Balls
- Playing Cards
- Halloween rings
- Stickers
- Bubbles
There are also some other things to keep in mind this Halloween if you have a child with a food allergy. If this isn’t your first rodeo, you’ve likely considered all the things listed below. If your child has been recently diagnosed however and this is your first Halloween navigating an allergy, you might find some of these tips quite helpful
– Consider making a “no eating until we get home” rule. Foods you might think are safe, might not be. It’s best to wait until you get home to check everything before eating. Some candy has ingredients you wouldn’t think they would have. For example, candy corn has egg whites in it, and licorice has wheat! Plus, some candy doesn’t have a label, so you have no idea what’s in it.
– Keep the emphasis on how fun the whole experience is, not just the candy.
– Pick up some non-food items to keep at home so your child can trade in their unsafe candy.
– If trick-or-treating just seems too stressful, skip it! Instead, celebrate Halloween with a party at home or a spooky family movie night with allergy friendly treats!
The Teal Pumpkin Project has been a huge help in raising awareness, and promoting safety, inclusion, and respect for those with food allergies. If you want to help make Halloween safe for all the little ghosts and goblins, you can buy some teal paint and paint a pumpkin to set on your doorstep. You can also find teal pumpkins for sale at stores in your community. If you want to learn more about this worldwide initiative, simply google The Teal Pumpkin Project and you’ll find plenty of great info!
Wishing you a safe and happy Halloween!
The post Non-candy Treats to Consider for an Allergy Aware Halloween appeared first on The Mabelhood.
]]>